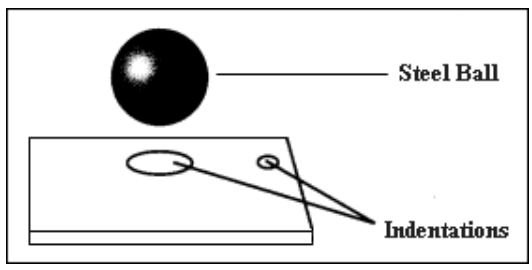
The rockwell hardness test is used to measure the ‘hardness’ of a plastic – it’s ability to resist permanent indentation. This information can be ascertained through the use of a loaded ball indenter.
In layman’s terms a loaded ball indenter is a weighted steel ball. The ball diameter will change depending on the test method used. This is in agreement with standard ISO 2039-2, but standard ISO 2039-1 may be used. The measured indentation depth is used to calculate the surface area of the indent and therefore the ‘hardness’. There are several different Rockwell Hardness test scales, each employ different sized steel balls and different loads. These scales are listed alphabetically and the most common scales for soft materials like plastics and rubbers are E, M, R and L.
What Can Be Tested?
Predominately, standard ISO 2039 can be used to test a wide variety of plastics but is generally chosen for ‘harder’ plastics such as nylon, polycarbonate, polystyrene and acetal. These plastics are preferred as the resilience/creep of the polymer is less likely to affect the results. A common market which utilises the knowledge gained from a Rockwell hardness test is the automotive component manufacturing industry. Manufacturers can understand how ‘hard’ their product is and also give an indication/clue of the products scratch resistance, strength, abrasion or wear but it shouldn’t be used alone for product design specifications.
Test Procedure
The Rockwell Hardness test method is performed in two key stages. By performing the test in these two stages it removes the potential for errors caused by and material surface irregularity and incorrect measuring due to backlash from the created indentation depth.
- The steel ball (indenter) is pressed into the plastic material at a specified force (normally 9.8N) and this is often referred to as the preload. The indenter is pressed to a specified indentation depth. This is known as the reference level for the test and all subsequent loads will be measured against this indentation depth.
- The indenter is allowed time to dwell, the timeframe will be in accordance with the relevant standard and then the indentation depth is again measured. The test force has preselected values 49N, 132N, 358N and 961N. Which value of force is chosen is dependant on the created depth in the material. The value must be between 0.15 and 0.35mm. If the indentation depth is out with these measurements then the force used must be adapted to suit the material.
Once completed, the indentation depth can then be determined. The depth is then used to calculate the surface area of the indent, and then the ball indentation hardness using a formula referenced in the standard.
Results
When writing the results from the Rockwell Hardness test there are two major indicators, a numeric hardness value and two letters “HR” indicating “Hardness according to Rockwell”.
For example, 45HR.
45 = Hardness Value
HR = Ball indentation hardness in neutrons per square millimetre (N/mm2).
All our testing programmes include full reports including the method of plastic testing and a full analysis of results and further recommendations, view here for our list of tests. For more info, get in touch via +44(0)1324 489182 or info@impact-solutions.co.uk.


